

This was a 1000 point game using the Leviathan deck – my first of phase 2 of the LWG’s Slow-Grow Campaign. This time my Alpha Legion warband was facing off against a force of Salamanders Space Marines (in actuality, the Ultramarines I’d previously allied with in game 1, but with a fresh coat of paint).
The Armies
We’re now into phase 2 of the slow-grow campaign, which means everybody’s army goes up to 1000 points.
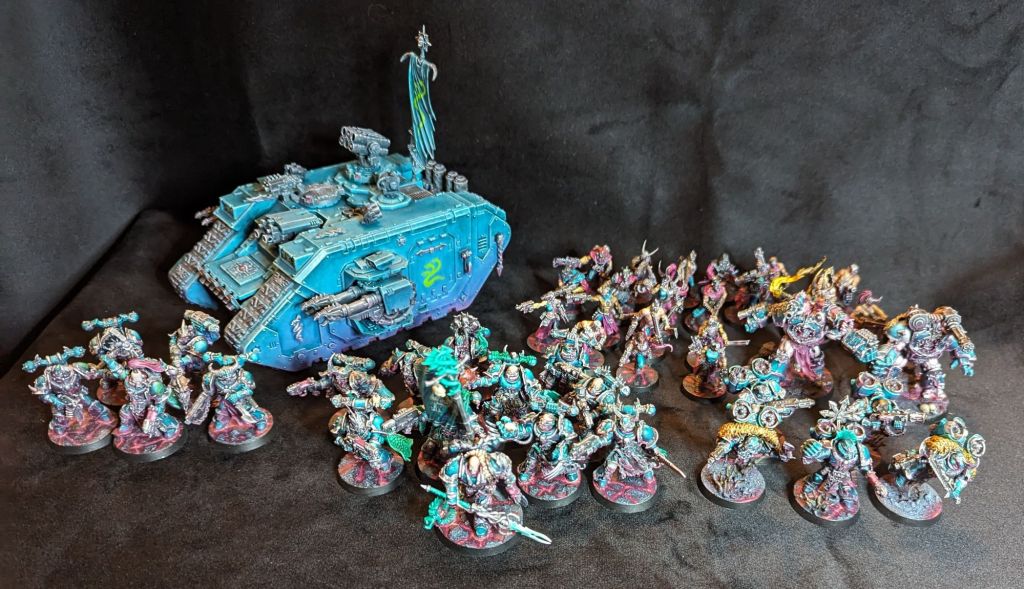
Alpha Legion: Chaos Lord, 10 Chosen, Land Raider, 5 Legionaries, 2 x 10 Cultists, 2 Obliterators, 5 Raptors
Salamanders: Terminator Captain, 5 Terminators, Chaplain, 5 Assault Intercessors, 2 x 5 Intercessors, 2 x 5 Infernus, Ballistius Dreadnaut, Impulsor
The Mission
We drew Take & Hold, Dawn of War deployment and Delayed Reserves. Both of us opted for tactical secondaries.
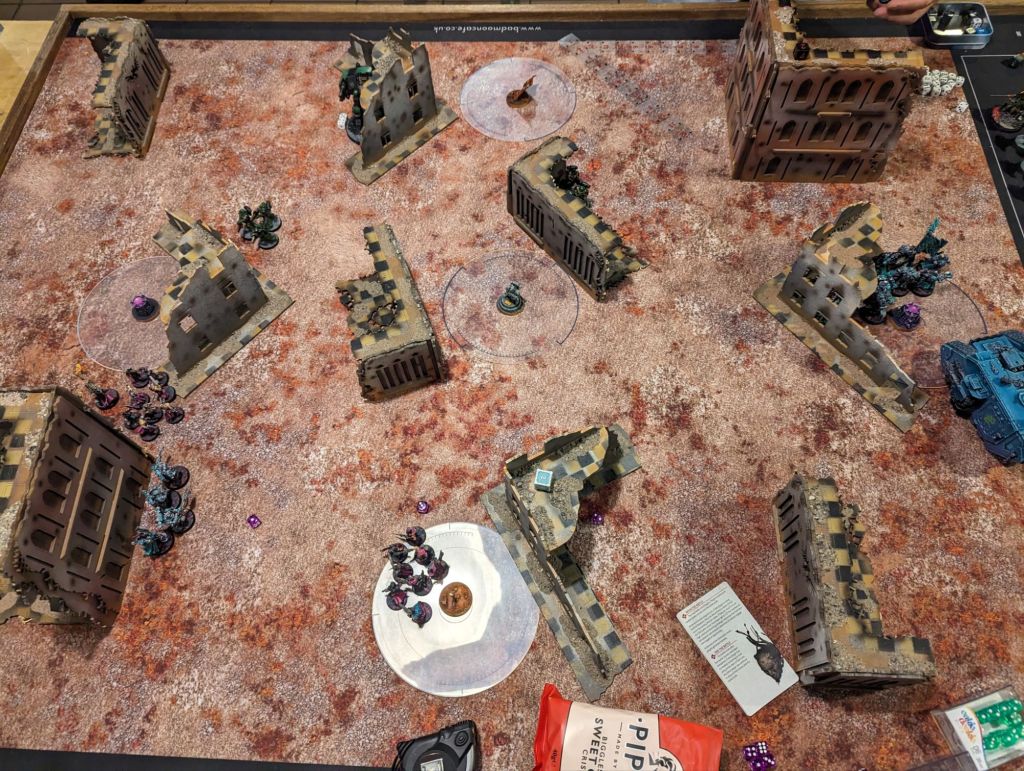
Deployment
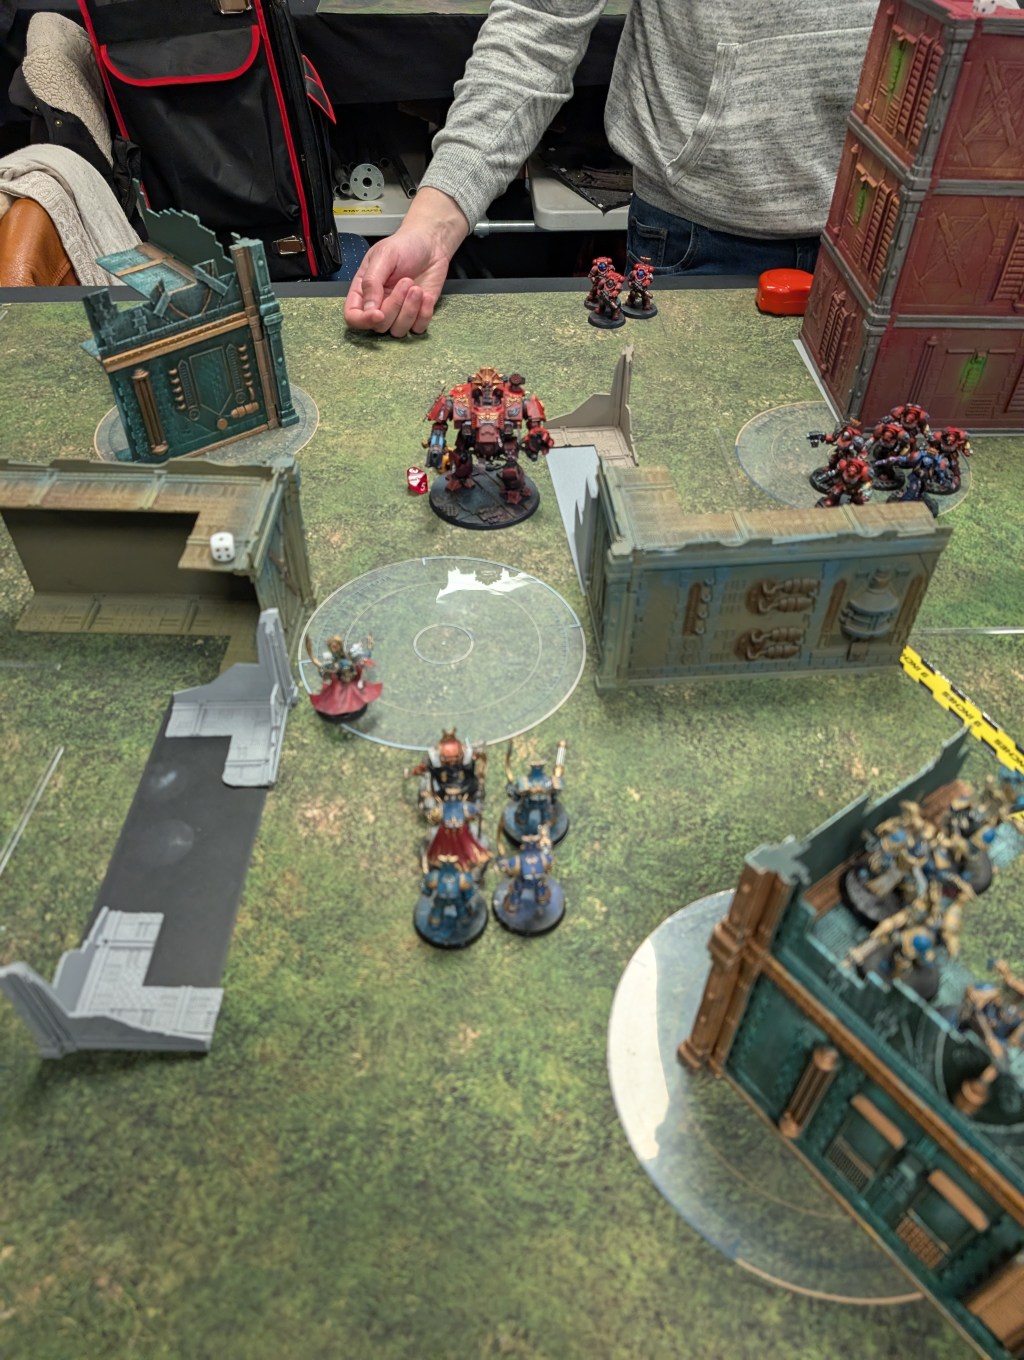
I kept my Obliterators and Raptors in reserve and my opponent did likewise with his Terminators. The Lord & Chosen were in the Land Raider, one squad of Infernus marines were in the Impulsor.

Turn 1
Salamanders got first turn and pushed forwards. The Ballistus tried to target the Land Raider but I played Dark Obfuscation, forcing it to target a Cultist mob instead, pulverising two with its lascannons.
On my turn the Land Raider moved up the flank, opening fire with its huge collection of guns but failing to actually injure anything. However it disgorged its cargo of Chosen who charged in, wiped out a squad of regular and assault-flavoured Intercessors and their accompanying Chaplain and claimed the right side objective. On the other flank the cultists and Legionaries moved up, but not far enough to get on the objective on that side. The Cultist grenade launcher popped an Infernus marine and the Legionaries autocannon put a small dent in the Ballistus.
Salamanders: 0
Alpha Legion: 5 (Extend Battle Lines)
Turn 2
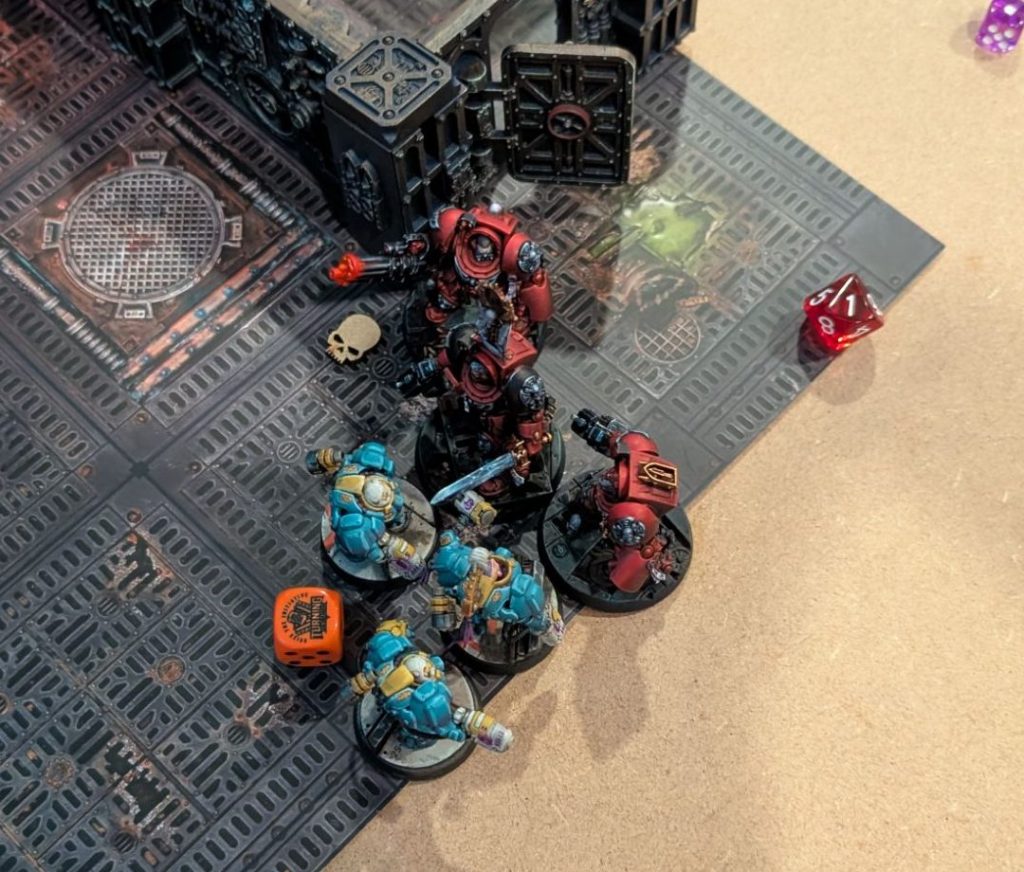
The Marines’ Oath of Moment went on the Chosen and they were brutally slaughtered by most of the Salamanders army, including the newly-arrived Terminators, who made a 10” charge to polish off the last of them in melee and consolidate into the Land Raider, taking the objective in the process. However they didn’t go down without a fight – literally – with the Eternal Hate stratagem allowing the Lord and a couple of Chosen to lash out as they were cut down and take an entire Infernus squad with them.
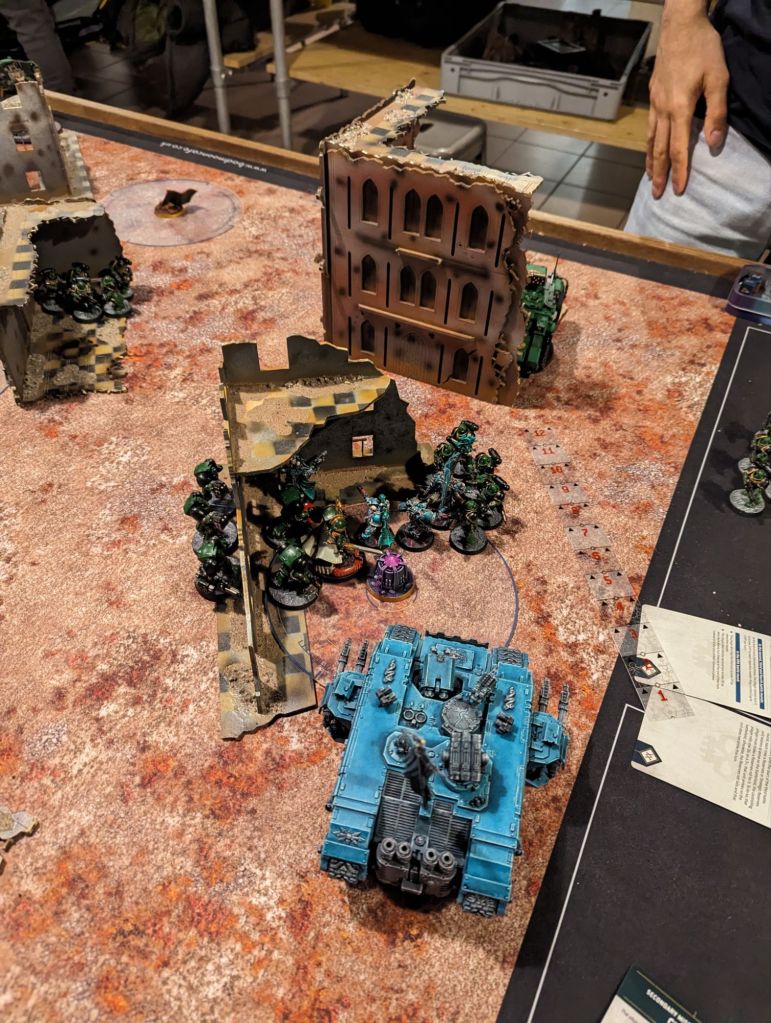
On my turn, my Land Raider fell back and retreated towards my board edge, attempting to force the Terminators to choose between holding the objective or chasing it down. On the other flank, the cultists moved onto the left-hand objective but all but one were immediately barbecued by the remaining Infernus squad. The sole survivor charged in but predictably died quickly. The Legionaries coming up behind them managed to take control of the objective, however. I tried to bring my Raptors out of reserves but due to the Delayed Reserves rule they didn’t make it. The Obliterators did, however, plopping down onto the Salamanders’ home objective and taking it for Chaos, netting me two Secondaries at once. They pulled out their biggest guns and blasted away at the Dreadnaut, but rolled poorly and didn’t make a dent.
Salamanders: 5 (Primary) + 5 (Assassinate)
Alpha Legion: 5 (Primary) + 5 (Storm Hostile Objective) + 8 (Capture Enemy Outpost)
Turn 3
The Terminators took the bait and chased after the Land Raider, however even though they managed to charge it they found it a hard nut to crack, only doing a few wounds. Most of the Salamander’s ire was focussed on the Obliterators who had popped up behind them, however. Mass shooting took down one of them and charging Intercessors injured the other, but it was still alive and hit back, killing two marines.
I played Skinshift on the Obliterators, bringing them back up to full strength. The remaining Cultist squad moved up to take the central objective and the Raptor squad finally arrived from reserves and landed on the objective recently vacated by the Terminators, who meanwhile were finding the Land Raider a tough nut to crack, with two of them being blasted apart by point-blank lascannon beams. The newly restored Obliterators obliterated the remaining Intercessors in melee, taking back control of the objective.

Salamanders: 5 (Primary) + 5 (Storm Hostile Objective)
Alpha Legion: 10 (Primary) + 5 (Secure No Man’s Land)
At this point we were running low on time and I was in control of every objective on the board, so my opponent graciously conceded.
Final Result (including paint):
30 to 42, Alpha Legion Victory!
Post-Mortem
This was my first time playing with the Leviathan deck (all my previous games were either Crusade or the Slow-grow custom scenario and it was a lot of fun – the secondary objectives add a lot of spice to the game.
On the whole I was pretty happy with how I played this game, firstly because I won, but also because I felt I was finally playing in a more Alpha-Legiony way, making smarter decisions and not just charging in headlong. In particular the use of Stratagems was super-impactful and I’m not sure I would’ve won without them.
Lessons learned:
- One risky aspect of my list is that I’ve put a lot of eggs/points in one basket/Land Raider with my big Chosen gank squad. This can reliably nuke anything (besides Aberrants) but it’s likely a one-shot deal since even with 10 of them they don’t have the resilience to stick around long once they’ve murdered everything in the immediate vicinity. In this case it paid off, with them managing to take down three enemy units and forcing my opponent to dedicate most of his resources to one side of the board to take care of them. Meanwhile my weaker objective scoring units could do their thing unmolested. Is this an entirely reliable strategy? Probably not, but I guess we’ll see how it goes as I play more games with this list.
- I need to be a bit more tactical in where I place individual models within a unit – in this case keep the Chosen with the best loadouts closer to the Lord. When they were getting gunned down I resisted putting wounds on the model with the Chaos Icon since I didn’t want to lose the Dark Pacts re-roll. However, had I pulled him (or, better, kept him next to the must-die-last Lord) the Terminators would have failed their charge since he was the closest model. So, really, two lessons here: better to lose the icon than the whole unit and better to keep the unit formation in such a way that I don’t have to make that choice.
- A lesson from previous games that paid off here; Terminators are scary and tough to kill, but they’re slow and you don’t have to kill them if you can bait them into a bad position.
- I kept forgetting to use Dark Pacts this game. It seems my brain can either handle using Stratagems or Dark Pacts effectively, but not both at the same time.
- The Raptors being delayed coming out of reserves by a turn actually worked out really well for me since it meant they could drop down straight onto a free objective. It may be worth resisting my natural urge to bring everything on as soon as possible and doing this on purpose in future.


Leave a comment